

Updated: May 10, 2024
Published: April 21, 2017
User data warrants verification in just about every application containing these forms. In all likelihood, if you have experience working with WPF application forms, you’ve had to deal with the implementation of validation in some capacity. In spite of the large number of choices on hand, most of them are developed to function at a “field level.” As such, upon searching for “WPF validation,” you’ll learn how to use IDataErrorInfo. What if the entire form warrants validation, though?
WPF application example
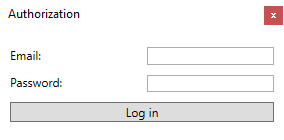
For instance, you have an app that has authorization built into it, as well as an authorization window like this one:

We’ll get the following if the code is expressed:
<Window> <Grid> <TextBlock Text="Email: "/> <TextBox x:Name="EmailTextBox"/> <TextBlock Text="Password: "/> <TextBox x:Name="PasswordTextBox"/> <Button x:Name="LoginButton">Log in</Button> </Grid> </Window>
You’ll have the login service, of course:
Public class LogInService { public bool LogIn(string email, string password) {
In real life you will have some server communication here…but for now:
return email.Equals("valid@email.com") && password.Equals("validPassword"); } }
As suggested, when you perform a query searching for the answer, you may use IDataErrorInfo to disable the Login button (depending on the results of validation). This method is it will warrant an abundance of interaction with the server. This is why I’ve written this article: a login request can’t be submitted on all password fields or email alterations as it might block your account or IP, among other issues.
The answer – INotifyDataErrorInfo
Thankfully, we have INotifyDataErrorInfo and IDataErrorInfo, both of which can resolve the problem once implemented, so your model can be viewed as follows:
public class MainWindowViewModel : INotifyDataErrorInfo { public string Email { get; set; } = ""; public string Pass { get; set; } = ""; public IEnumerable GetErrors(string propertyName) { if (string.IsNullOrEmpty(propertyName) || (!HasErrors)) return null; return new List<string>() {"Invalid credentials."}; } public bool HasErrors { get; set; } = false; public event EventHandler<DataErrorsChangedEventArgs> ErrorsChanged; public bool CheckCredentials() { HasErrors = !new LogInService().LogIn(Email, Pass); if (HasErrors) { ErrorsChanged?.Invoke(this, new DataErrorsChangedEventArgs("Email")); ErrorsChanged?.Invoke(this, new DataErrorsChangedEventArgs("Pass")); } else { return true; } return false; } }
Errors are shown by HasErrors. It’s set to check for credentials once. An actual error is returned by GetErrors. Subscribers are informed about new errors by ErrorsChanged. Also, we supplemented the public helper approach, CheckCredentials, which can be called from the view using our LoginService. Check out this example:
private void LogInButton_Click(object sender, RoutedEventArgs e) { if (((MainWindowViewModel) DataContext).CheckCredentials()) { Close(); } }
Bindings will need to be added with ValidatesOnNotifyDataErrors=True in XAML:
<TextBox x:Name="EmailTextBox" Grid.Row="0" Grid.Column="1" Margin="5" Text="{Binding Email, ValidatesOnNotifyDataErrors=True}"/> ... <TextBox x:Name="PasswordTextBox" Grid.Row="1" Grid.Column="1" Margin="5" Text="{Binding Pass, ValidatesOnNotifyDataErrors=True}"/>
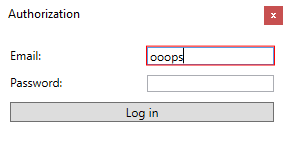
Once the app is launched and you enter an incorrect password/email once clicking the login button, this is what you’ll see:

Using ValidationRule for Field level validation
Now let’s talk about actual field-level validation. Think about the modifications we made in the INotifyDataErrorInfo and begin with the ValidationRule method. To see if the email is legitimate, we will use a validation rule of our own. There’s no need to do things from scratch or have your regexp rewritten. I recommend using the following System.Net.Mail.MailAddress:
public override ValidationResult Validate(object value, CultureInfo cultureInfo) { try { new MailAddress(value.ToString()); } catch (Exception) { return new ValidationResult(false, "Please enter a valid email."); } return new ValidationResult(true, null); }
Then we add it to XAML:
<TextBox x:Name="EmailTextBox" Grid.Row="0" Grid.Column="1" Margin="5"> <TextBox.Text> <Binding Path="Email" UpdateSourceTrigger="PropertyChanged"> <Binding.ValidationRules> <local:EmailValidationRule ValidationStep="RawProposedValue"/> </Binding.ValidationRules> </Binding> </TextBox.Text> </TextBox>
If you have already begun developing your app and it resembles this, then you typed in an incorrect email address:
It changes as you type and will disappear if you enter the valid email.
A common example IDataErrorInfo
Most of the data found online on this topic are in reference to IDataErrorInfo. The first step is to implement it into the view mode:
public class MainWindowViewModel : IDataErrorInfo { ... public string this[string columnName] { get { switch (columnName) { case "Email": if (!IsValidEmail(Email)) return "Please enter a valid email."; break; } return string.Empty; } } public string Error { get; } private bool IsValidEmail(string email) { try { new MailAddress(email); } catch (Exception) { return false; } return true; } }
Our indexer inspects the email field when using just the helper approach, IsValidEmail. You must include binding in XAML with ValidatesOnDataErrors=True
And in XAML:
<TextBox x:Name="EmailTextBox" Grid.Row="0" Grid.Column="1" Margin="5" Text="{Binding Email, UpdateSourceTrigger=PropertyChanged, ValidatesOnDataErrors=True}"/> If you run it once it develops, you’ll have a similar outcome as the one you obtained with the earlier method.
Displaying a validation error text
If you must display a specific message rather than the generic red line around your text box, you can do so by having the ErrorTemplate overridden in XAML, like so:
<Validation.ErrorTemplate> <ControlTemplate> <StackPanel> <AdornedElementPlaceholder/> <TextBlock Text="{Binding [0].ErrorContent}" Foreground="Red"/> </StackPanel> </ControlTemplate> </Validation.ErrorTemplate>
If you add some space, the form will look like this when you test it:
In closing
WPF provides numerous tools to validate forms. If you would like to leave your thoughts or provide recommendations, please do so in the following comment section:
Just in case you have any troubles with this particular case or anything else just Contact Us with the contact form to the right and we’ll be in touch with you soon. Existek is a custom software development company that specializes in the Microsoft Technology Stack such as .NET and C# development. Check our Custom Software Development Services Page to learn how we can help you with your next .NET project and our 2017 Custom Software Development Rates Guide to learn more about outsourcing trends in 2017.